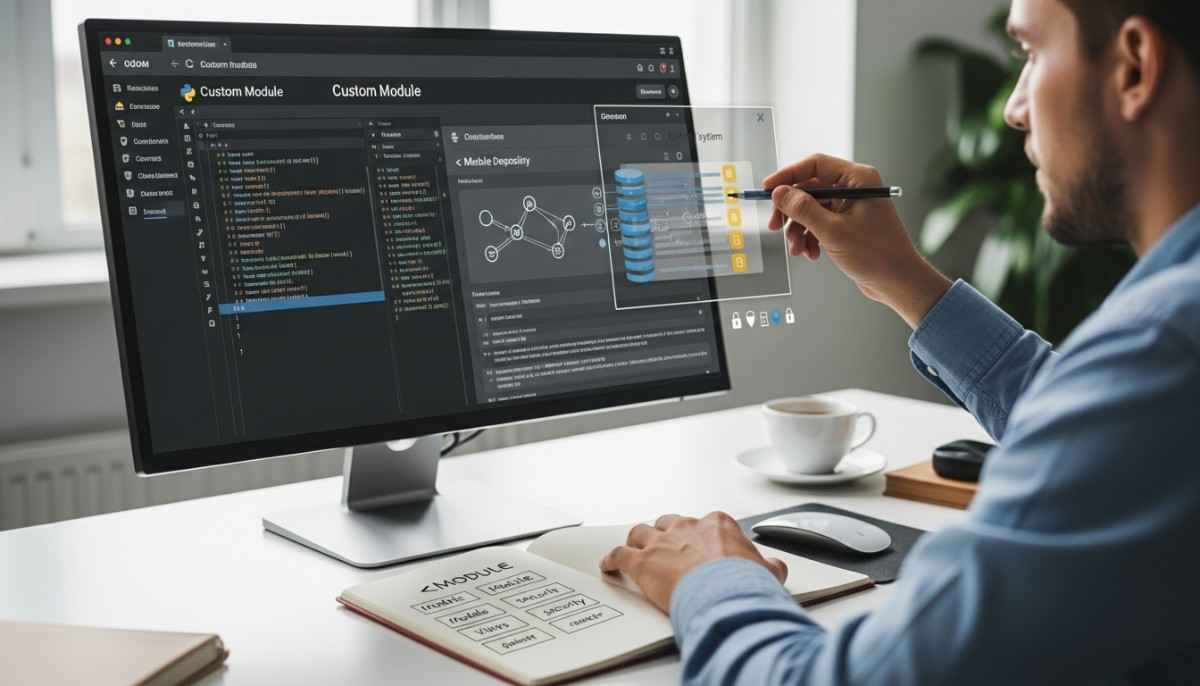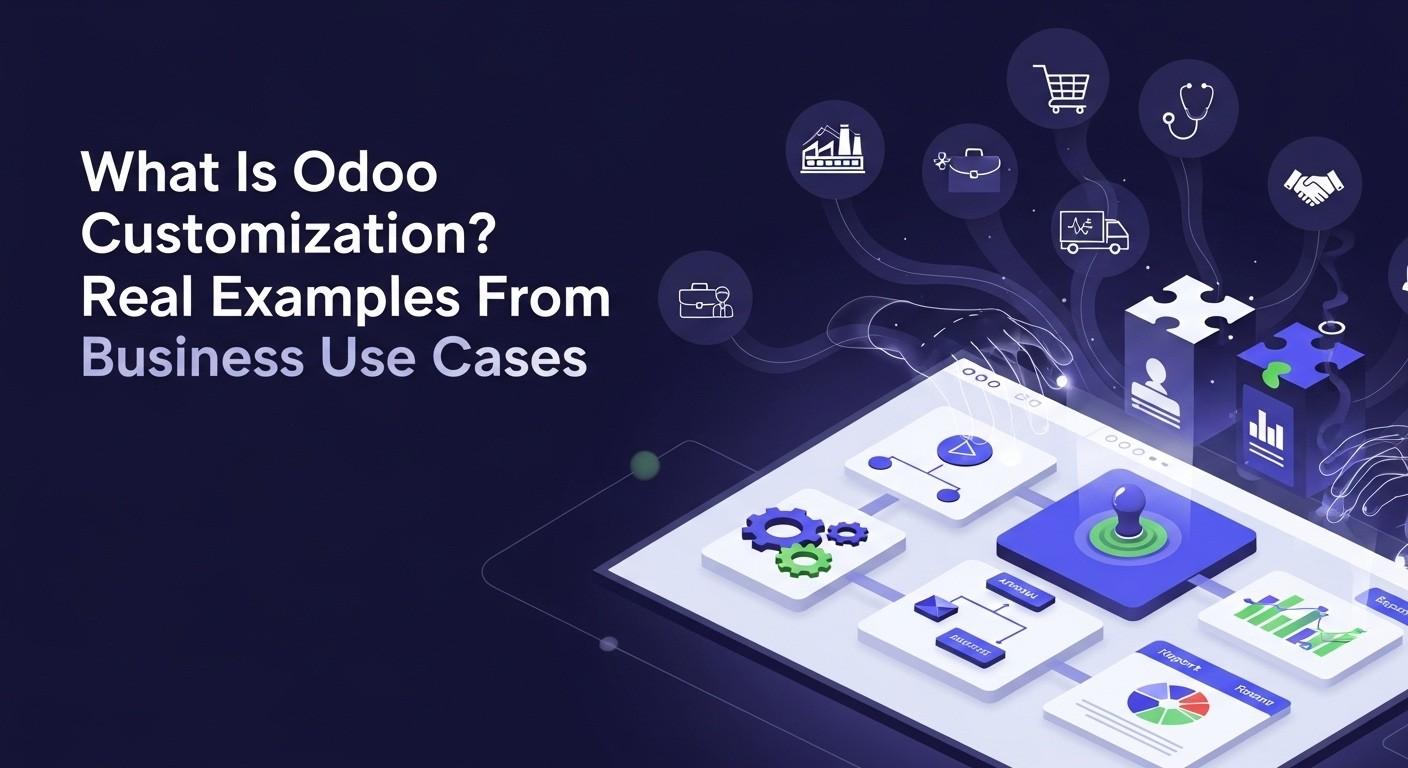
Odoo’s modular architecture is one of its greatest strengths, allowing businesses to extend functionality without compromising the core system. Custom Odoo module development enables organizations to tailor their ERP system to specific business requirements that off-the-shelf solutions cannot address. Whether you’re automating unique workflows, integrating third-party systems, or building industry-specific features, understanding how to create custom modules is essential for any serious Odoo developer.
This guide walks you through the complete process of developing professional-grade Odoo modules, from initial setup to deployment. We’ll cover the technical foundations, best practices, common pitfalls, and advanced concepts like ORM efficiency and module inheritance. By following Odoo development standards and OCA guidelines, you’ll be equipped to build scalable, maintainable, and upgrade-safe customizations that integrate seamlessly with Odoo’s ecosystem.
What Is an Odoo Module?

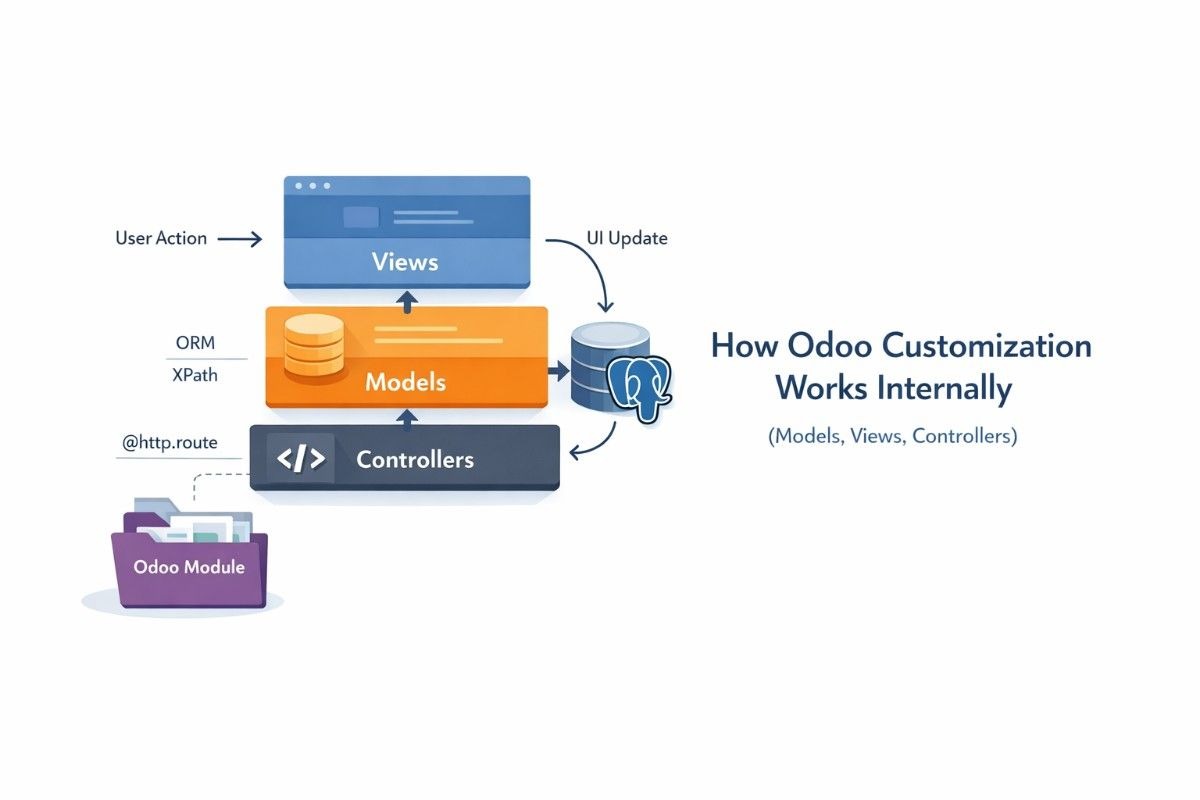
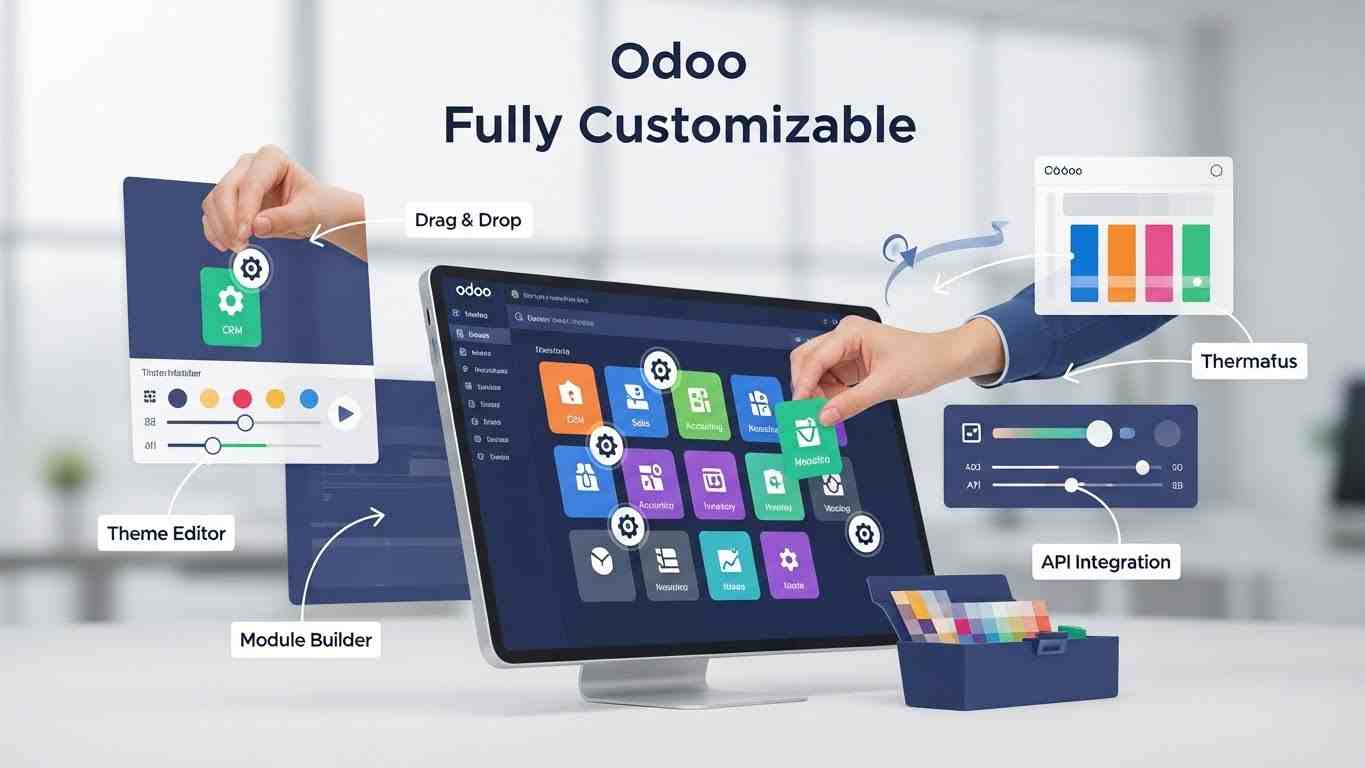
An Odoo module is a self-contained, plug-and-play software package that adds or modifies functionality within the Odoo framework. Each module operates independently yet can interact with other modules through Odoo’s powerful Object Relational Mapping system. Modules can introduce new business objects, extend existing models, add user interface components, implement business logic, or integrate external services.
The modular design philosophy allows developers to enable or disable features without affecting the entire system. Modules can depend on other modules, creating a hierarchical structure where complex functionality builds upon simpler foundations. This architecture promotes code reusability, maintainability, and clean separation of concerns, critical factors for long-term ERP success.
Prerequisites & Environment Setup
Technical Requirements
Before diving into Odoo module development, you need a solid foundation in several technologies. Python proficiency is essential since Odoo’s backend is built entirely in Python. You’ll need to understand object-oriented programming, decorators, and Python’s data structures. XML knowledge is equally important for defining views, actions, and data files. Familiarity with PostgreSQL helps when optimizing database queries, though Odoo’s ORM abstracts most database interactions. Additionally, understanding the Odoo framework’s architecture, including its Model-View-Controller pattern and ORM capabilities, will accelerate your learning curve.
Development Environment Setup
Setting up a proper development environment is crucial for efficient Odoo module development. Start by installing Odoo from source, either through GitHub or by downloading the community edition. Create a Python virtual environment to isolate dependencies and avoid conflicts with system packages. Choose a robust IDE like Visual Studio Code with Python extensions or PyCharm, which offers excellent debugging capabilities for Odoo development.
Configure your Odoo addons path in the configuration file to include your custom module directory. This allows Odoo to recognize and load your modules during startup. Finally, activate developer mode through the settings menu or by adding the debug parameter to your URL. This enables technical features like view architecture inspection, field details, and direct access to menu item configurations.
Odoo Module Folder Structure Explained
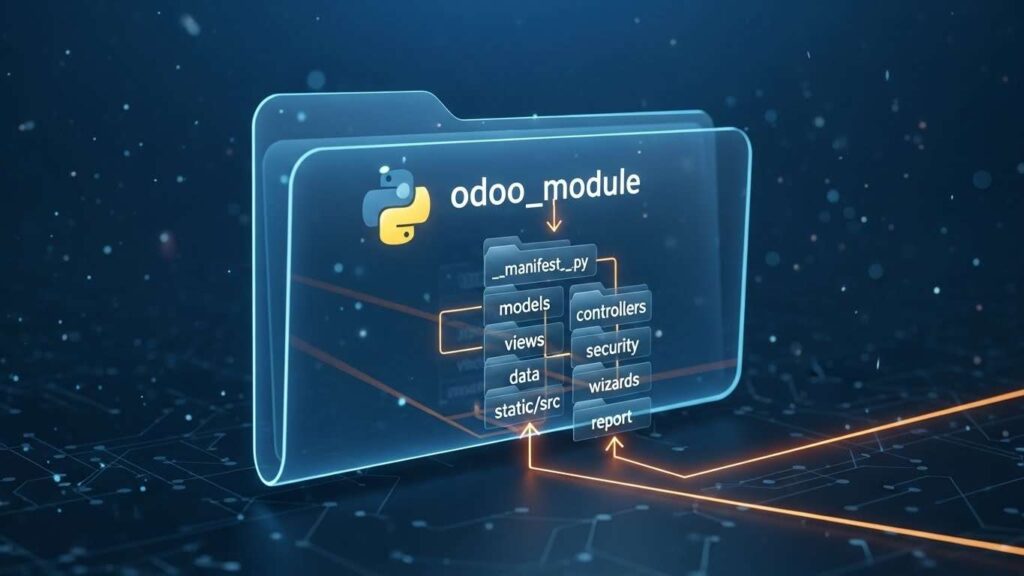
Understanding the standard Odoo module structure is fundamental to professional development. Each module follows a consistent organization that Odoo expects. The models directory contains Python files defining your business objects and logic. The views folder holds XML files that define user interface components like forms, lists, and kanban views. The security directory manages access rights through CSV files. The data folder stores initial or demo data loaded during module installation. The controllers directory handles HTTP routes for web pages and API endpoints. Finally, static folders contain frontend assets including JavaScript, CSS, and QWeb templates.
Every module requires two essential initialization files at the root level. The manifest file serves as your module’s metadata descriptor, containing crucial information about name, version, dependencies, and data files. The Python initialization file serves as the package initializer and imports your module’s components. Additional directories can be created based on specific needs, but maintaining this standard structure ensures compatibility and makes your code easier for other developers to understand.
Step-by-Step Guide to Creating a Custom Odoo Module
Step 1 — Create the Module Folder & Manifest
Begin by creating a new folder in your Odoo addons directory with a unique, lowercase name using underscores. Inside this folder, create the two essential initialization files. The Python initialization file imports your module’s components, typically starting with importing the models directory.
The manifest file is a Python dictionary containing crucial metadata about your module. It includes the module name, version number following Odoo’s versioning convention, category for organization in the apps list, a brief summary, author information, and your company website. The depends field lists all modules your custom module requires to function properly. The data field contains a list of XML and CSV files to be loaded during installation, and this order is critical as files are processed sequentially.
Critical consideration: The data loading order in your manifest determines when each file is processed. Files are loaded in the sequence you specify, so ensure dependencies are loaded first. Security files should typically come before view files to avoid access permission errors during installation. This is one of the most common sources of installation failures for new developers.
Step 2 — Define Python Models & ORM Logic
Create a Python file in the models directory with a descriptive name. Don’t forget to import it in the models initialization file. Define your model by inheriting from the base Model class provided by Odoo. Each model represents a database table and defines the structure of your business objects.
Your model class should include a unique internal name using dot notation, which becomes the database table name with underscores. Add a description field for documentation purposes and optionally specify a default ordering field. Then define your fields using Odoo’s field types. Common field types include Char for short text, Text for longer content, Integer and Float for numbers, Date and Datetime for temporal data, Boolean for true/false values, Selection for dropdown options, and relational fields like Many2one, One2many, and Many2many for connecting different models.
ORM Efficiency and Decorators are crucial for professional development. Odoo provides powerful API decorators to optimize your code and ensure data integrity. The depends decorator is used with computed fields to specify which fields trigger recalculation when they change. The constrains decorator validates field values before database commits, raising validation errors if business rules are violated. The model decorator is used for methods that don’t require a specific record instance, operating at the model level rather than record level.
Always use the ensure_one method in instance methods that should operate on a single record. This prevents errors when dealing with recordsets containing multiple records. When writing business logic, keep calculations and validations in your model methods rather than scattering them across views or controllers. This centralization makes your code more maintainable and testable.
Step 3 — Create XML Views
Views define how your data appears in the Odoo interface. Create an XML file in the views directory with a descriptive name. XML files must start with the proper XML declaration and be wrapped in an Odoo root element. Each view is defined as a record in the ir.ui.view model.
Form views display detailed information about a single record, typically used for creating and editing. They use a sheet layout containing groups and fields arranged in a user-friendly manner. Tree views, also called list views, show multiple records in a tabular format, ideal for browsing and quick actions. Kanban views present records as cards in columns, perfect for visual workflow management. Search views define filters and group-by options that appear in the sidebar.
Each view record requires a unique external identifier, which follows naming conventions for consistency. The view name should be descriptive and follow a pattern indicating the model and view type. The model field specifies which business object this view displays. The architecture field contains the actual XML structure defining the layout and fields to display.
External IDs, also called XML IDs, are crucial for maintainability. They allow other modules to reference and extend your views without knowing their database IDs. Use descriptive names that clearly indicate what the record represents. Following conventions makes your modules more professional and easier for other developers to extend.
Step 4 — Add Menu Items & Window Actions
Connect your models to the user interface through window actions and menu items. Window actions define what happens when a user clicks a menu item—which model to display, which views to use, and in what order. These are records in the ir.actions.act_window model.
A window action specifies the action name shown in breadcrumbs, the model to display using its internal name, and the view mode as a comma-separated list determining which views are available and their presentation order. You can also specify domain filters to show only certain records, context variables to pass default values, and default view types.
Menu items create the navigation hierarchy in Odoo’s interface. Top-level menus appear in the main navigation bar, while child menus create dropdown structures. Each menu item can link to an action that opens a view, or serve as a parent for organizing related submenus. The sequence field controls the order in which menu items appear, with lower numbers appearing first.
Step 5 — Add Security Rules
Security configuration is mandatory to avoid forbidden errors when users try to access your models. Create a CSV file in the security directory following the standard naming convention. This file defines access control lists that specify which user groups can perform which operations on your models.
The CSV file format includes columns for a unique identifier, a descriptive name, the model reference, the user group reference, and permission flags for read, write, create, and unlink operations. Each row grants a specific set of permissions to a particular user group for a specific model.
Common user groups include base users who can typically read and write, managers or administrators who have full access including delete permissions, and portal users who might have limited read-only access. Without proper access rights, users cannot interact with your models even if views are correctly defined. This is one of the most common issues developers encounter when testing new modules.
Record rules provide more granular security by filtering which specific records users can access. These are defined in XML and use domain filters to restrict access based on record values. For example, you might allow users to only see their own records or records belonging to their department.
Step 6 — Implement Web Controllers
Controllers handle HTTP requests for custom web pages or API endpoints. Create a Python file in the controllers directory and define controller classes that inherit from the base Controller class. Don’t forget to import the controllers directory in your main initialization file.
Controllers use decorators to define routes that map URLs to Python methods. The route decorator specifies the URL path, the request type (either http for web pages or json for API calls), and the authentication requirement. Authentication options include public for anonymous access, user for logged-in users, and none for no session management.
Inside controller methods, you can access the current request object to retrieve parameters, user information, and environment variables. The environment object provides access to all Odoo models using the ORM. You can search for records, create new ones, or modify existing data. Controllers typically return rendered templates for web pages or JSON responses for APIs.
Controllers are essential for creating customer portals, public-facing pages, custom dashboards, or REST APIs for third-party integrations. They bridge the gap between external requests and your Odoo business logic, handling URL routing, input validation, and response formatting.
Step 7 — Final Files, Installation, and Testing
Add demo data in XML files within the data directory for testing purposes. Demo data populates your module with sample records, making it easier to test functionality without manual data entry. Include static assets like custom JavaScript, CSS stylesheets, or QWeb templates in the static directory. Remember to reference these files appropriately in your manifest.
To install your module, restart the Odoo server with the update flag pointing to your module name, or update the apps list through the interface. Navigate to the Apps menu, remove any default filters, and search for your module name to install it. During installation, Odoo loads all specified data files, creates database tables for your models, and applies security rules.
Testing is crucial for ensuring your module works correctly. Activate developer mode to access technical information and debugging tools. Monitor server logs for Python exceptions, warnings, or SQL errors. Use the browser console to debug JavaScript issues and inspect network requests. Test all CRUD operations—creating, reading, updating, and deleting records. Validate that constraints work as expected, raising errors when they should. Verify security rules work correctly across different user groups and roles.
Test your module with realistic data volumes to identify performance issues. Check that views render correctly across different screen sizes and browsers. Verify that any integrations or external connections function properly. Document any special installation steps or configuration requirements for future reference.
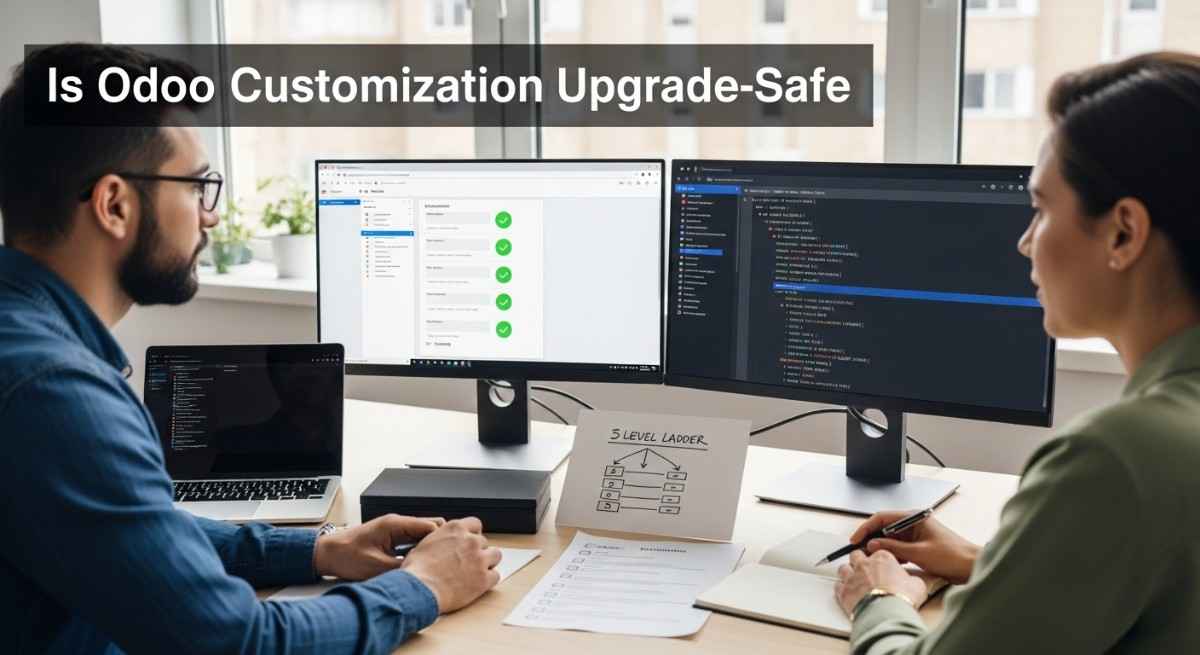
Odoo Module Inheritance
Odoo’s inheritance mechanism allows you to extend existing modules without modifying their source code. This is fundamental to maintaining upgrade-safe customizations. There are three main inheritance types, each serving different purposes.
Classical inheritance reuses the same model name, adding new fields and methods to an existing model. This approach directly extends a model’s functionality without creating a new database table. Extension inheritance uses different model names, creating a new model that incorporates features from existing ones. Delegation inheritance uses a special inherits attribute to borrow fields from another model through a Many2one relationship.
For extending models, you create a new Python class that specifies which existing model to inherit from. You can add new fields, override existing methods while calling the parent method using super, or add entirely new methods. This approach ensures your customizations remain separate from core code, making upgrades smoother and reducing the risk of conflicts.
View inheritance uses XPath expressions to modify existing views without replacing them entirely. You specify which view to inherit from, then use XPath to locate specific elements in the original view. Position attributes determine how your modifications are applied—you can add elements before, after, inside, or replace existing elements entirely.
This inheritance system is what makes Odoo so flexible and upgrade–safe. You can customize almost any aspect of Odoo without touching core files, ensuring your modifications survive version updates and don’t conflict with other modules.
Best Practices for Professional Odoo Development
Following Odoo coding guidelines ensures your modules are professional, maintainable, and compatible with future Odoo versions. Use meaningful variable names that clearly indicate their purpose. Follow Python conventions for code style, including proper indentation, naming patterns, and documentation. Organize your code logically—keep business logic in models, presentation logic in views, and HTTP handling in controllers.
Avoid directly overriding core methods when possible. Instead, use inheritance and super calls to preserve original functionality while adding your customizations. This approach prevents breaking existing features and makes your code more maintainable. Implement proper error handling with appropriate exception types that provide clear messages to users and developers.
Write descriptive commit messages and maintain good version control practices. Your commit history should tell the story of your module’s development, making it easier to understand changes and roll back if needed. Document complex logic with clear comments explaining why decisions were made, not just what the code does.
Ensure scalability by optimizing database queries. Avoid iterating through large recordsets without batching, as this can cause memory issues and poor performance. Use count methods instead of length functions when you only need the number of records. Leverage Odoo’s built-in caching mechanisms and avoid unnecessary database writes that slow down operations.
Internationalization should be built in from the start. Make your modules multilingual by wrapping user-facing strings with the translation function. Generate translation files and place them in the internationalization directory to support multiple languages. This preparation makes it much easier to deploy your module in multilingual environments.
Keep modules focused on specific functionality. Smaller, focused modules are easier to maintain, test, and reuse than large monolithic ones. Create dependencies between modules rather than cramming everything into a single package. This modular approach aligns with Odoo’s philosophy and makes your work more flexible.
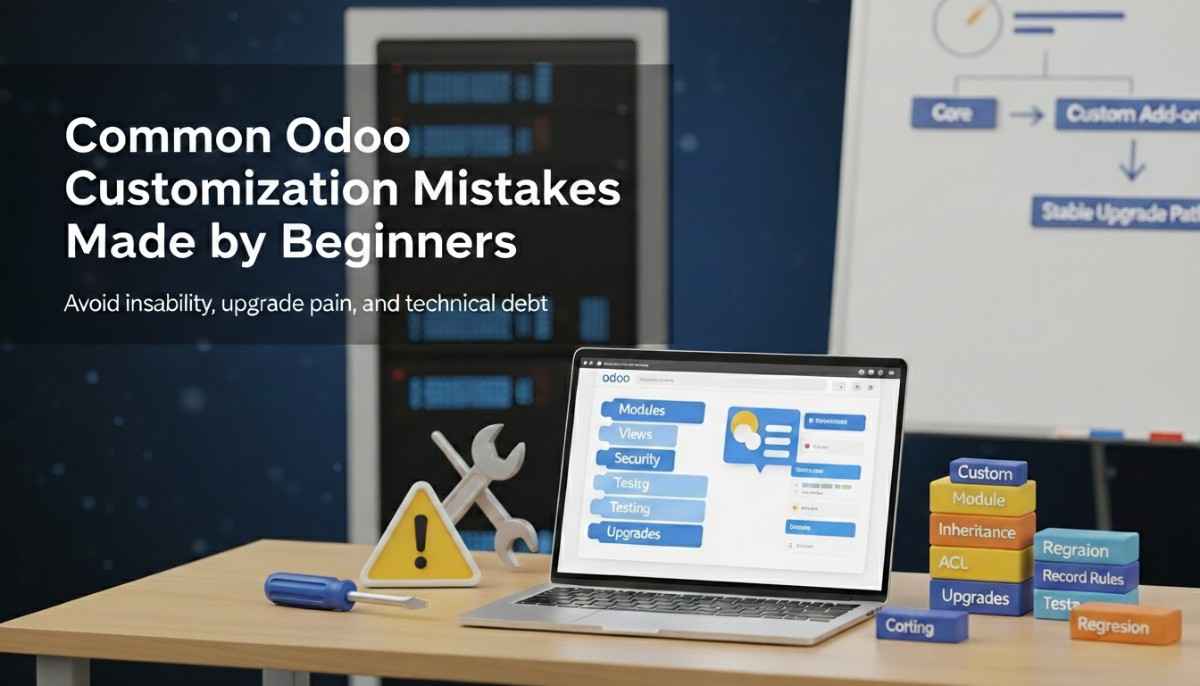
Common Mistakes to Avoid
Several pitfalls can derail Odoo module development, and understanding them helps you avoid frustrating debugging sessions. Incorrect manifest fields are a common issue—especially wrong dependencies or missing data files. Forgetting to list a required module in dependencies causes installation failures. Misspelling file paths in the data list means those files won’t load during installation.
Forgetting access control rules leads to cryptic permission errors that puzzle new developers. Users see forbidden messages even though views are correctly defined. Always create comprehensive security rules covering all your models and different user roles. Test with non–administrator users to catch permission issues early.
Poor folder structure makes modules difficult to maintain and violates Odoo conventions. Other developers expect certain files in specific locations. Deviating from standards without good reason creates confusion and makes your code harder to understand. Follow the established structure unless you have compelling reasons to diverge.
Hard-coding values instead of using configuration parameters or system parameters reduces flexibility. Values that might change should be configurable rather than buried in code. This makes your module more adaptable to different environments and customer requirements without code changes.
Ignoring the manifest data loading order causes dependency errors when views reference security groups or models that haven’t loaded yet. Files must be listed in the correct sequence, with security typically before views, and base data before dependent data. Understanding this loading sequence prevents many installation headaches.
Not testing across different browsers or screen sizes can create UI inconsistencies. What works perfectly in Chrome might break in Firefox or Safari. What looks great on desktop might be unusable on mobile. Test your interfaces across platforms to ensure consistent user experiences.
Overriding core functionality without understanding the implications can break existing workflows. Always check the Odoo source code to understand what you’re extending. Read through the original method implementation and consider what side effects your changes might have. When in doubt, extend rather than replace.
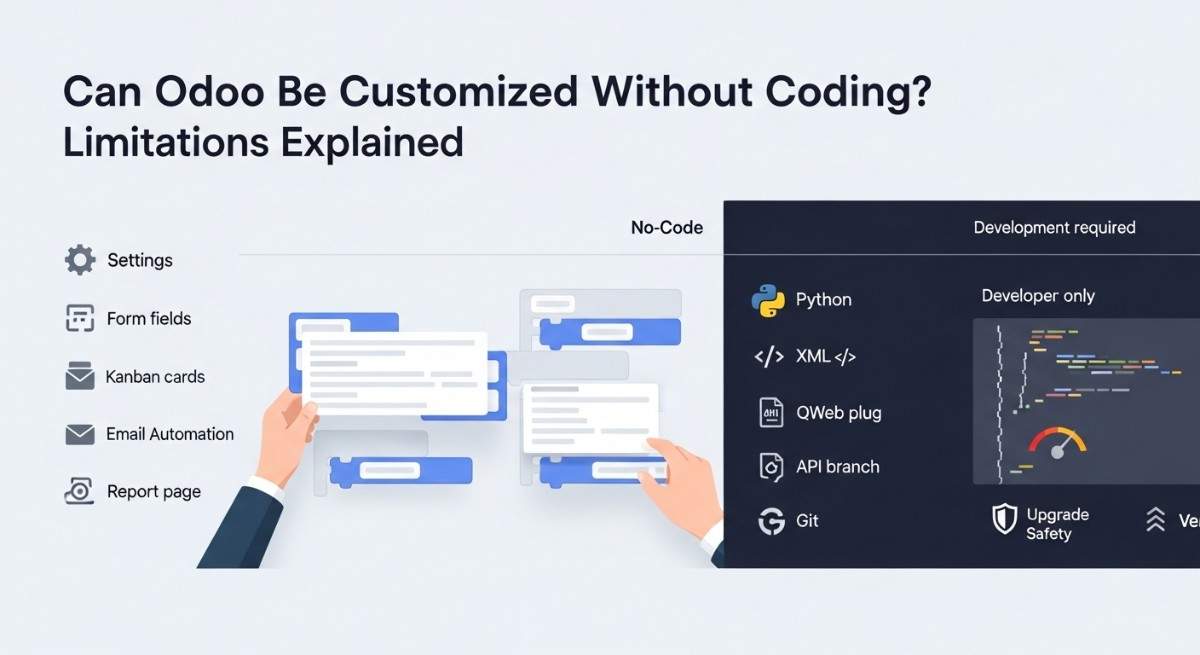
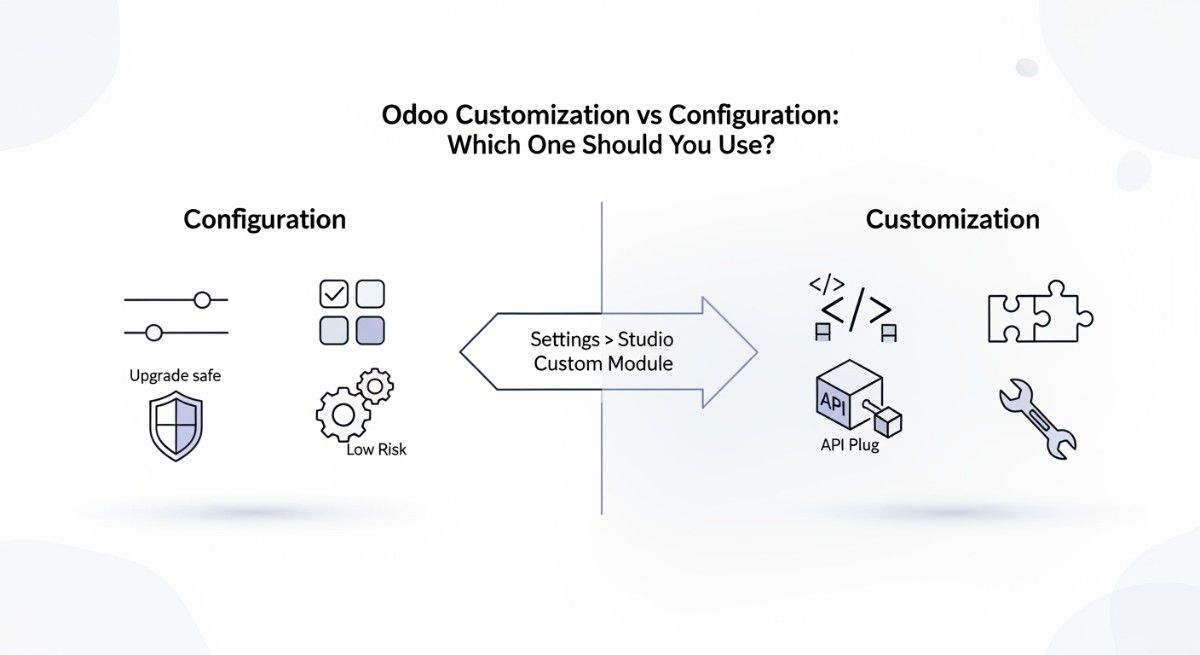
When to Use Odoo Studio vs Custom Module Development
Odoo Studio is a low-code tool that allows rapid customization through a graphical interface. Understanding when to use Studio versus traditional development helps you choose the right approach for each situation. Studio excels in certain scenarios where speed and simplicity are priorities.
Studio is ideal for simple modifications like adding fields to existing models, creating basic views with standard layouts, building simple automation rules with straightforward conditions, or generating standard reports from existing data. Studio works best when customization requirements are straightforward and don’t require complex business logic or advanced programming concepts.
The visual interface makes Studio accessible to business analysts and power users who understand business requirements but lack deep programming knowledge. Changes can be made quickly, often within minutes, without server restarts or technical deployment processes. For prototyping and proof-of-concept work, Studio provides rapid iteration capabilities.
However, Studio has limitations that become apparent with complex requirements. Custom business logic, advanced workflows with multiple conditions and states, third-party integrations requiring API calls or data transformations, and custom algorithms for calculations or optimizations all require traditional module development. Studio-generated customizations can be less efficient than hand-coded solutions, and they’re harder to version control properly.
For production-grade solutions requiring scalability, comprehensive testing, and long-term maintainability, custom module development is the professional choice. Traditional development provides complete control over code quality, performance optimization, and integration complexity. You can implement sophisticated patterns, optimize database queries, and create reusable components that Studio cannot achieve.
Final Thoughts
Custom Odoo module development is a powerful skill that transforms Odoo from a standard ERP into a perfectly tailored business solution. By following structured development practices, leveraging Odoo’s ORM efficiently, and adhering to coding standards, you create modules that are robust, maintainable, and upgrade-safe. The investment in learning proper development techniques pays dividends through reduced debugging time, easier maintenance, and more reliable systems.
Start with simple modules to build confidence, then gradually tackle more complex requirements. Each module you build deepens your understanding of Odoo’s architecture and best practices. Study existing modules from the Odoo Community Association for real-world examples of professional code organization and implementation patterns.
Engage with the Odoo community through forums and GitHub to stay current with best practices and emerging patterns. The community is generous with knowledge and always willing to help developers learn and improve. Contributing back by sharing your own modules or helping others creates a positive cycle that benefits everyone.
Remember that good module development is not just about making something work—it’s about building solutions that scale, adapt, and serve your organization for years to come. With practice and dedication, you’ll develop the expertise to create sophisticated Odoo customizations that deliver real business value.
Frequently Asked Questions
How do I fix “Access Denied” or “Forbidden” errors in my custom module? These errors occur when security access rights are missing. Create an ir.model.access.csv file in your security folder with proper read, write, create, and delete permissions for your models. Ensure this file is listed in your manifest before view files.
Why isn’t my module showing up in the Apps list? Check that your module folder is in the correct addons path, verify your manifest file has no syntax errors, restart your Odoo server, and update the apps list. Remove the “Apps” filter in the search to see all modules including yours.
What’s the correct order for files in the manifest data list? Always list security files first, followed by data files, then view files, and finally menu files. This ensures access permissions exist before views try to reference them, preventing installation errors.
How do I extend an existing Odoo model without modifying core files? Use model inheritance by creating a new Python class with _inherit pointing to the existing model. Add your new fields and methods here. This keeps customizations separate and upgrade-safe.
My custom fields aren’t appearing in the view, what’s wrong? Verify the field is defined in your Python model, check that you’ve restarted the Odoo server or upgraded your module, ensure the field is added to your XML view file, and confirm you have developer mode enabled to see changes immediately.
How do I debug errors during module installation? Check the Odoo server terminal for detailed error messages and stack traces. Common issues include incorrect file paths in the manifest, missing dependencies, or syntax errors in XML files. Read error messages carefully as they usually indicate the exact problem.
Can I use inheritance to modify views from other modules? Yes, use view inheritance with XPath expressions. Create a new view record that references the original view using inherit_id, then use XPath to locate and modify specific elements without replacing the entire view.
What’s the difference between ir.model.access and record rules? Access rights (ir.model.access) control which models users can access and what operations they can perform. Record rules provide finer control by filtering which specific records within a model users can see based on conditions.
How do I make my module work across different Odoo versions? Follow OCA guidelines, avoid using deprecated APIs, test on target versions, use version-specific manifest files if needed, and keep dependencies minimal. Document version compatibility clearly in your module description.
Why does my module work locally but fail on production? Check that all dependencies are installed on production, verify file permissions are correct, ensure the database is properly migrated, confirm the correct Odoo version is running, and review production logs for environment-specific errors.